SW Portland Martial Arts Blog

Building Shoulder Strength

August 19th, 2018
Building shoulder strength

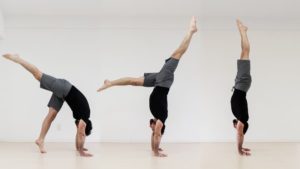
If you do CrossFit, Martial Arts, or both – you need strong shoulders. Maybe you are blessed with naturally stable and strong shoulders – good for you! For the rest of us, there are countless ways of building strength. In the video above, I outline a program suitable for beginners to strength work.

First important point – start light, add weight gradually, and always err on the side of caution. This stuff is supposed to make you stronger, not hurt you.

Second important point – have someone who knows what they are doing coach you through all these movements and periodically check back in with them, so they can see how your form has progressed.

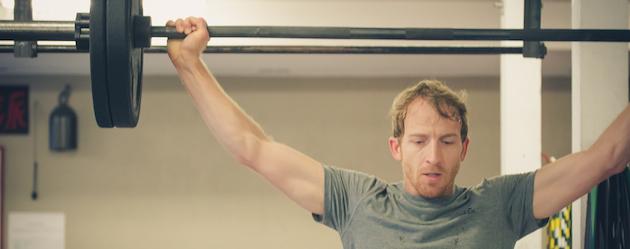
I recommend two main lifts – the shoulder press and the bench press. You could do one of these lifts, or both of these lifts. If you’ve got 25 minutes to spare once a week in the gym, do one of them. If you’ve got 25 minutes to spare twice a week in the gym, do both of them.   If you do have the time to do both of them, you should, never the less, only start with one of them for the first few weeks. These lifts should be done before any conditioning work (like a CrossFit workout or a martial arts class).

The basic protocol for both main lifts is to once a week do five sets of five reps. Your first set should be the lightest set, and each subsequent set should be heavier than the last. There is zero rush. Make your first week easy. Go light. Add small weights each time. The last set shouldn’t be hard. Always take a two to three minute break between sets.

I also recommend four auxiliary lifts. These are, as the name suggests, optional. If you find yourself with 15 minutes in the gym once a week, do one. If you have more time, do more of them – ideally you’d do these movements all on different days so that you aren’t overtaxing your shoulders. These lifts should be, ideally, the last thing you do in the gym – after your skill work, after your main lifts, after any martial arts practice.

The auxiliary movements are: the cuban press, the bottom up Kb press, the strict pull-up, and the bent over row. If you are just starting or only have time for one lift, talk to a coach about your particular shoulder issues and see which one (or maybe they pick an entirely different movement) they think is best for you to start with. Gradually add in the other movements if you have the time and if everything feels good.

The basic protocol for the lifts is four sets of five/five (meaning five on each side of the body). For the pull-ups, do four sets of at least five reps (use a band or do negatives if you can’t do at least five strict pull-ups in a row). Take a two to three minute break between sets.

Write your numbers down so that you know what weights to do the next week. Be consistent and do the lifts every week. It is better to do fewer lifts and be more consistent than to spread yourself too thin and be inconsistent. In addition to writing your numbers down, try and write yourself a note about each lift – how did the movement feel? What questions do you have about the movement?

There may be some initial discomfort as your body adapts to the movements but if you take things slow, it should be pretty minimal. If you’ve never done these movements consistently, expect awesome things to happen – and definitely ask lots of questions.

Escaping Mount

June 11th, 2018

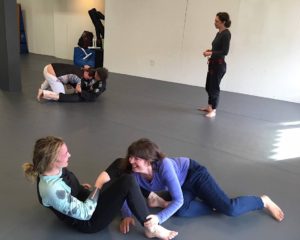
I got to teach two classes for MDP camp this year – one about how to escape bottom mount position and one about how to use knee ride. Both classes were about applying groundwork to a self defense situation. The text that follows was the paper handout I gave to all the students who attended the mount escape class.

————

In this class, we will be working on confronting the problem of what to do if we end up on the ground in a self defense scenario. Specifically, we will be concentrating on escaping from the bottom mount position.

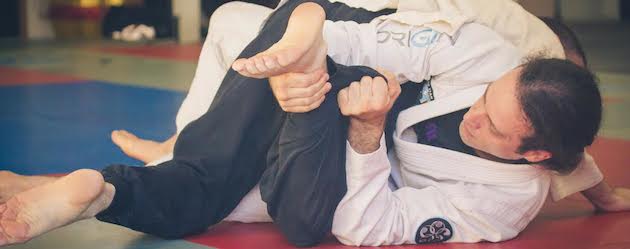
For clarity, let’s first define what bottom mount position is. Bottom mount is when we are flat on our backs and our partner is on top of us, with their knees outside of our hips. Sometimes, our partner might have their chest on us, mashing their body weight into us, sometimes they might be sitting upright delivering punches and elbows – both of these things are mount. There are, of course, tons of other terrible positions we might end up in but for this class, we will be concentrating only on bottom mount.

For further clarity, we will talk about why bottom mount position is a bad position and why it is a priority to change the position as opposed to strike or defend against strikes (we may still strike and defend but changing the position is the big concern.) Bottom mount is a terrible position for three main reasons: gravity is not on our side, we are constrained severely in our capacity to move, and our partner has the reach to hit us effectively in the head whereas we can not reach to hit our partner’s head. If we try to solve the problem striking at our partner, they are liable to strike at us and they have better targets, gravity, and their hips. If we prioritize defending against our partner’s strikes, then our situation will, at best, not deteriorate. Therefore, if we want to confront the problem of being in bottom mount, we must improve our position.

For ease of communication, we will be breaking the learning up into a three part steps. Those three steps are: technique, drilling, and play. The technique step will involve learning the pieces that make up the move – there should be no competition or fighting during this step. The drilling step involves some specific defense from our partner – they do a specific thing so that we can use the technique and see both the when and where of one possible application. The last step, play is where we try to apply the technique against an actively resisting partner – we may find that we have to change the technique radically or even use a different technique based on how our partner attacks.

To help build competency, we will be focusing on only two techniques so that (hopefully) in an hour long class, everyone can feel like they’ve had all their questions answered and they (at least) can do the techniques against a non-resisting partner. Reasonable competency (which we will define here as the ability to escape from bottom mount against a fully resisting, untrained person who weighs up to 10% more than you) groundwork typically takes between 6 months and a year of twice a week training.

The first technique we will learn will probably be familiar to many in the MDP community – the bridge and roll. We will break the bridge and roll down into 5 steps: bring your feet to your hips, block the foot, block the hand, bridge, and roll. Bringing the feet up to the hips gives you maximum leverage. Blocking the foot and hand will help prevent your partner reaching out a limb and stopping the roll. Bridging will life your partner up, making them easier to roll. Rolling will put you in top guard – thus improving your position.

The bridge and roll is a great technique but, like all techniques, doesn’t work if someone counters correctly, or if your timing is off, or if your partner is massively bigger (double your weight is a reasonable limit) than you. For all these reasons, when we first learn the technique, or any technique, it is helpful to do it against minimal resistance. Communicate clearly! If your partner resists, remind them that we are doing technique work and them resisting is going to hamper your learning.

The second technique to escape mount that we will learn is called the elbow escape. This more complex movement involves seven steps: keep your elbows down, roll 45 degrees over to one side, reach across their leg with your far foot, drag their leg over your close leg, pop your knee through, rotate 90 degrees over to your opposite side, take the underhook, and then use your free arm to frame. Keeping your elbows down stops the position from getting worse (high mount). Rolling over 45 degrees sets you up so you can reach their leg easier. Reaching across undermines their base. Dragging their leg over limits their movement options and sets you up to move to half guard. Rotating over to the other side makes it harder for them to smash you down. The underhook and the free arm frame both make you even harder to smash down and at this point, you are in bottom half guard, an improved position.

As with the first technique, communicate clearly with your partner while drilling. There should be no resistance while you are first learning. Your partner will need to still have some structure to their body so that you can move but they shouldn’t be fighting you. If one person improves, their new skills will help the whole community improve. As the cliche goes – iron sharpens iron.

Once we’ve got both techniques, we will work a drill concentrating on two specific scenarios – what to do if our partner’s knees are tight or loose? In the drill, our partner will feed us one of two options – are they squeezing us tight with their knees or are they relatively loose with their knees? If they are tight, we will do the bridge and roll. If they are loose, we will do the elbow escape.

For those who have seen both these techniques before and have a decent level of competency in groundwork, we will go over how to stand up from top guard (if you used the bridge and roll) and how to sweep from bottom half guard (if you used the elbow escape) – because our original goal, in this self defense situation, is to stand back up to our feet.

At that point, we will have done technique and rolls so we will finish the class with the last step – play. Partner’s will start in mount position. The partner on the bottom will try to escape. The partner on top will try to pin. The game will be over if either partner taps or if the bottom partner escapes to standing. The game can be modified in many ways – so communicate clearly with your partner. Consider competency, size difference, and injury when deciding how hard you and your partner should play. It is also completely fine to stick with the previous drill rather than escalate to play. For those who want the full self defense feel, they can add strikes as well.

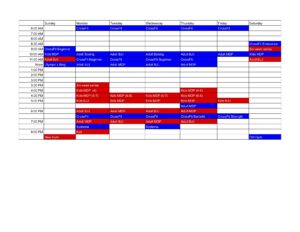
Thanks for the opportunity to teach at camp! I love questions and feedback. Please send me your thoughts or just come ask me. If you want to get better at groundwork, check our BJJ schedule at Southwest Portland Martial Arts – all enrolled MDP students can attend those classes that concentrate on groundwork at no charge.

Camp Class Preview

June 2nd, 2018
Strike, Takedown, Pin

This year, for MDP camp, I’ve been asked to teach a class about takedowns and groundwork for self defense. The two big questions behind the class will be: how and why might we, in a self defense situation, want to take an attacker to the ground? To answer these questions, the students and I have been playing with three techniques and a drill that are starting to coalesce into a decent class.

The three techniques involved in the drill are: a jab, an ankle pick, and the knee ride position. We settled on these three because they are fairly simple, the combine together well, and they allow the student to move from standing to a ground control position while still allowing for the option of standing back up if necessary.

The jab is the setup. As with all setups, if you can land it – bonus! The drill, however, assumes that your partner is going to parry and step away from your strike. This defensive action should give you the opportunity to step in and move on to the second technique – the ankle pick.

The ankle pick is a good fit for this drill because it allows you to take your partner down, and keep control of them by holding on to the shoe, pant leg, or foot without having to follow them all the way to the ground, ending up in side control or mount. While those positions are powerful and functional, we wanted to pick a control that allowed for easier disengagement, so we opted for knee ride.

Knee ride is probably going to be the technique that confuses students the most. It can be difficult figuring out which knee goes where, how to distribute your weight, and how not to injure your partner. We think the effort is worth it, because knee ride can provide a platform from which to strike, remain mobile, and disengage if necessary.

The jab to ankle pick to knee ride drill will be the first section of the class. It provides one answer to the “how” question that I opened this post up with – how do we take someone down? Well, we could fake a jab, move to an ankle pick, and then slide into knee ride. We could, of course, do many other different things to accomplish this same goal and for those students who feel comfortable, we will play a bit and explore some of those options. We will also allow folks who want to play further, the opportunity to sparring to see what happens when resistance gets added.

The “why” question, if you recall, was – why would we take someone down in a self defense situation? This is not a simple question to answer but one line of thought is: given that people can generate the most power when they are standing and can freely utilize their hips, if you can put them on the ground and control them then they are much less able to deliver a strong punch. Put another way, even a completely untrained person can hit hard if they are standing up but if they are flat on their back with you on top of them, not so much.

Hope to see you all at camp! You can still sign up here.


Summer Martial Arts Special!

May 25th, 2018

Have you been hiding in the shadows, waiting to sign up for martial arts classes? Come out into the light and train for all of July and August for only $30! Normally, two months of training would cost you $180 but this brilliant special offer gets you access to all our adult martial arts classes at a $150 discount.

Sign up by clicking the button below. This offer is good for adult martial arts classes (all of them! Boxing, Jiu-jitsu, Systema, Arnis, Mo Duk Pai). This offer is not good for kid’s classes or CrossFit classes.

There are no contracts to sign – just click the button, get out of the shadows, and get in the door!

Punch cards
Enter your email below:

Three lessons from the Kids Tournament

April 29th, 2018

I try, after every class I teach, to write down one thing that I think I could have done better, or one thing that worked particularly well, or one thing that completely flopped (and I should avoid in the future), or an idea that a student brought up, or… You get the idea – I try to write something down that will improve the quality of future classes.

I do this for the tournaments that we run twice a year as well. I try to write one thing down for each of the three events (grappling, forms, sparring) that will make the event run more smoothly. I decided to type those thoughts up into a blog post in hopes that other people might also have ideas on how to make things better.

With all this talk of making things better, I hope this doesn’t give the impression that I think the tournaments are a disaster. No way. I think our tournaments are pretty awesome but I also think that there is always room for improvement.

For grappling, it appears that we need to do a better job communicating to the parents exactly what is involved in sport grappling. Over the 8 or so years we’ve been running these events, on several occasions, parents have been shocked to see their children out on the floor choking another child, or being choked. For those of us who have done lots of grappling, this seems like an obvious thing but why wouldn’t, as a parent, you freak out if you saw this happening and had no idea as to the rules of sport grappling? So, I will do my best at the next tournament to explain what the goal of sport grappling is – submitting your partner – and how tapping out works, and how tapping keeps everyone safe. The kids know this already so the explanation will be for the parents, so if there are parents who haven’t sat and watched a class where their child participates in sport grappling, they know what is happening and what tapping out looks like. Maybe it would be a good idea to adopt the Sambo rules around verbal tapping which are (I think) any noise or word is a tap – but that seems a bit on the oppressive side to me.

For forms this time, it was really cool to see the kids do improvised forms during the mystery division. What made the improv forms so interesting was that they looked more like a real fight than the memorized forms did! What this tells me, as a teacher, is that we need to add pad hitting and partner work into our forms so that students are more likely to visualize the fight when they are performing. (It was Sifu Allen who noticed the “aliveness” of the improv forms and pointed it out to everyone, full credit goes to him.)

For sparring, it finally dawned on me that everyone has a Roundhouse kick. In fact, the Roundhouse kick seems to be the ONLY thing that some students have in their toolbox. As a result, pretty much everyone knows how to defend the Roundhouse kick. What to do? Keep the Roundhouse kick but build up the other kicking angles so that the poor Roundhouse kick isn’t left all alone in the toolbox. Front kicks, side kicks, hook kicks, axe kicks… all the kicks!

Anyway, those are my thoughts. I appreciate all the feedback I got this time from students, helpers, parents, and teachers. Let’s work together to make every tournament better than the last!